Photographing Alaska through a dirty window
Spend enough time in Alaska and you will eventually find yourself in a small plane above some of the most breathtaking scenery on the planet. If you’re a photographer this can be bittersweet because, unless you’ve chartered the plane specifically for photography, you will find, situated between you and this scenery, a pane of dirty, fogged, scratched acrylic plastic that sucks the contrast, color, sharpness, and soul out of every image you try to make.
by Mark Meyer · Posted in: digital alterations · photography techniques
Even in pristine condition, small plane windows tend to be green and curved which introduces spatial and color distortions into your photographs. They effectively convert your $2000, nano-crystal-coated, extra-low dispersion lens into a Holga. Since we're not all hipsters, some of us object to this.
In the days of film and early digital photography the challenges of haze and aircraft vibrations were difficult enough. Window distortions made the images truly useless even with high contrast slide film like Velvia. With today's RAW image workflow, shooting through a plastic window is still less than ideal, but you can often coerce a terrible capture into something significantly better. You still lose sharpness, shadow detail, and color precision, so shooting through plane windows is still a nonstarter for professional aerial work, but using a good raw workflow can produce a final image that at least resembles what you saw and can be publishable in small formats and on the web.
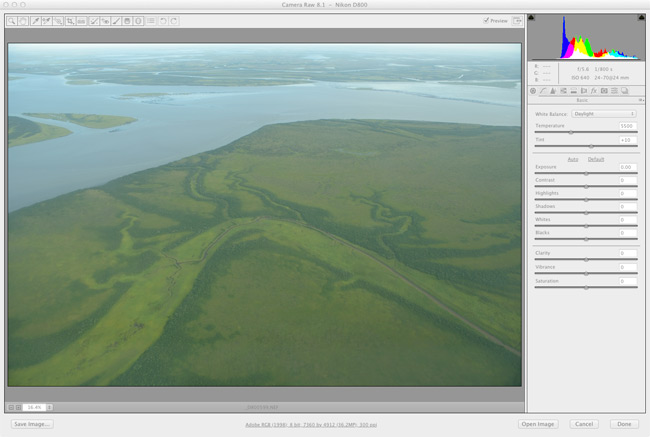
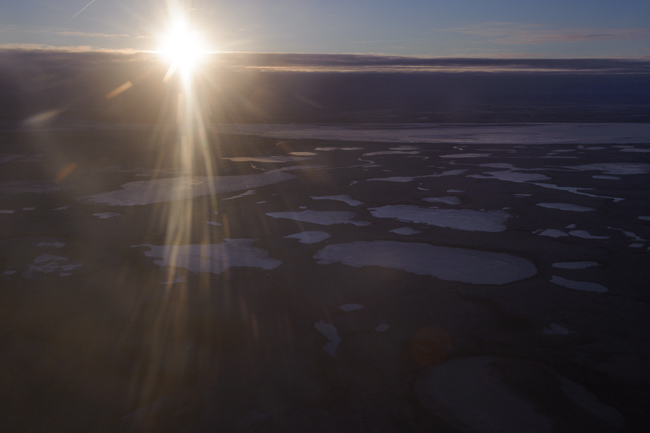
Here's the unprocessed version of the image leading this post. It's a landscape along the Kuskokwim River in western Alaska shot from a passenger seat on your standard air taxi's Cessna 208. Notice the total absence of shadows in the histogram:
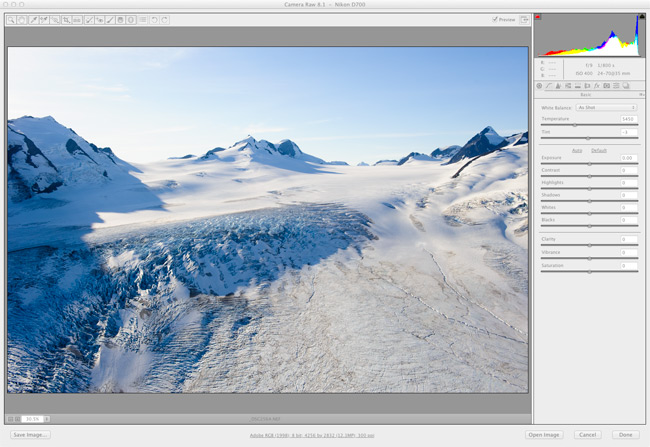
Compare this to an unprocessed shot from a helicopter with the doors off:
Because we can't make all our commutes in an open helicopter I've put together some quick tips for the next time you find yourself behind a plastic window over a glorious landscape.
Capture:
The standard aerial photography rules still apply. Shoot with a fast shutter speed (1/500 of a second or faster) and don't let the camera touch the window.
It is essential that you capture in camera RAW. When processing the images you will be stretching the histogram like silly putty; a jpeg will fall apart. A RAW workflow manipulates images in a high-bit, linear format, which allows much more latitude for corrections.
Expose to the right. Watch your histogram and try to capture as much light as possible without clipping highlights. This can help avoid noise in the shadows when processing.
Shoot with wide apertures. You don't need a lot of depth of field in aerial photography and you want to throw window scratches as far out of focus as possible.
Don't shoot into the sun. Although your lens may handle flare gracefully, dirty acrylic does not. If at all possible try to sit on the side of the plane opposite the sun and use a lens hood, keeping it as close to the window as you can without touching it. This can help reduce reflections if light is entering the plane from the opposite side.
In case you're wondering, this is how acrylic windows deal with flare:
Flare from direct sun on a plane window—not very pretty
Processing:
The plane window introduces two large problems: it shifts the color toward greens and blues and it introduces flair which pushes your blacks into the midtones and reduces overall contrast. The first problem is easily handled with the white balance and the second somewhat less-easily with the Blacks slider. If you are used to capturing as much as possible in-camera, you are probably accustomed to using Lightroom's sliders for small, nuanced changes. You'll quickly get over that. For most of these shots the Blacks slider was yanked down to about -65 and Tint was pushed up about +45. Pulling the blacks down this dramatically will crush some shadow detail that you'll probably want to retain. A generous bump in the shadows slider will compensate for most of this.
With just these two adjustments you'll be back in the ball park and can tweak the image with your normal color and contrast adjustments. The image will probably still need a significant increase in contrast. If you want it to look realistic avoid the temptation to correct contrast with the clarity or saturation sliders—if you want to increase local contrast or saturation, fine, but get the global contrast right first. You can improve haze by gently bumping down the luminance of blues in the HSL panel, but avoid over-correcting it—haze on the horizon provides aerial perspective which offers visual clues about distance—we've been seeing this in paintings for centuries and we're used to it.
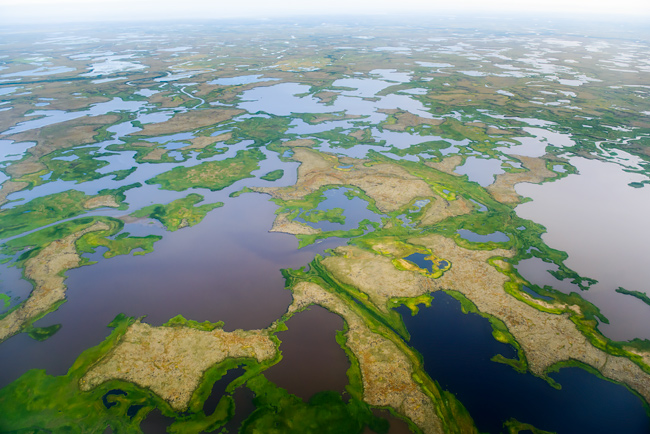
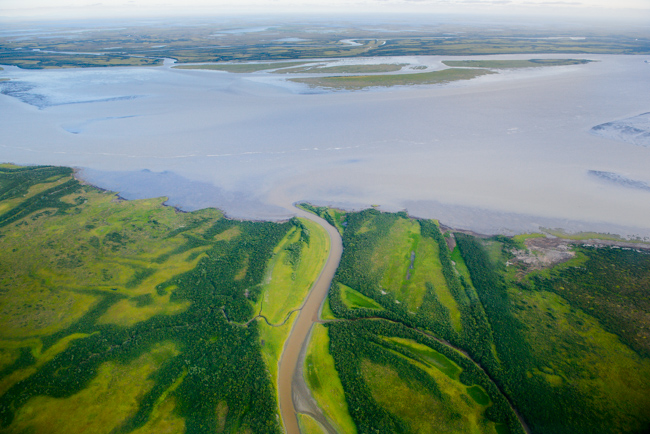
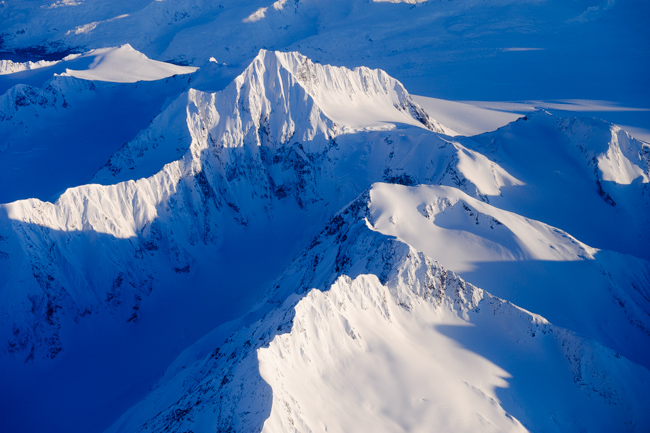
Here are a few more photos shot through small plane windows, which looked bad enough to throw away on capture and are at least passable with some heavy-handed processing:
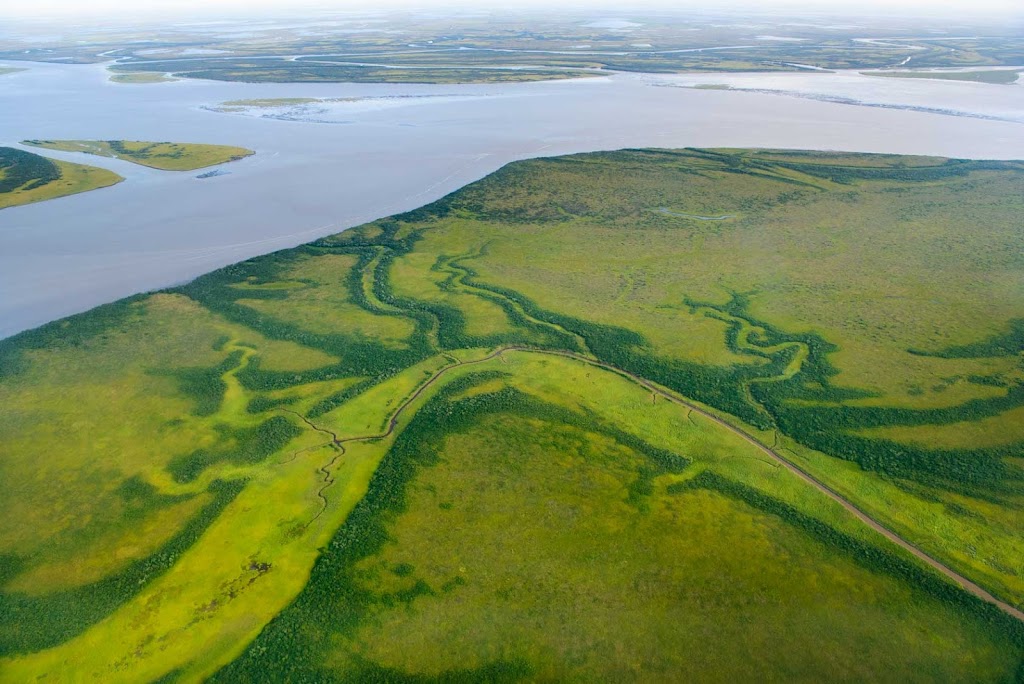
Wetlands in the Yukon-Kuskokwim Delta near the Bering Sea
The Kuskokwim River near Bethel, Alaska
Chugach Mountains
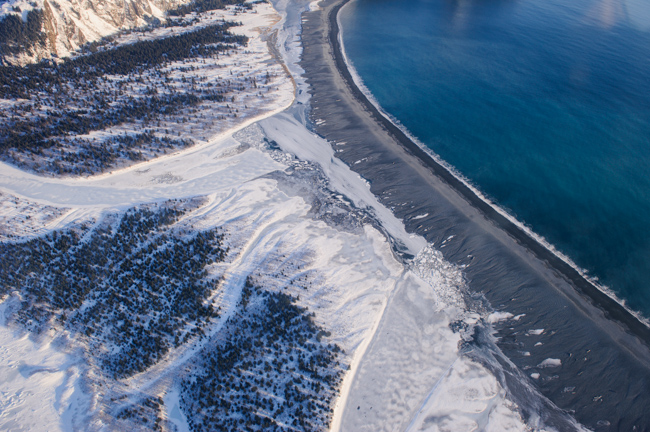
Beach near the Bear Glacier, Kenai Fjords